Showing posts with label recipes. Show all posts

September 4, 2019

Mini Pepperoni Pizza Cups

Finding ways to make school lunches easy and fun is something I am always looking to do. My oldest doesn't eat much at school, especially if it's a sandwich, so I try to think out of the box for him. I recently stumbled across some fun recipes and figured I'd put my own spin on this little pizza one. My oldest loved them, and they were easy to make ahead and freeze for later! These would even be great as an appetizer for a party or get together...who doesn't like pizza?

These are quick and easy to make, and you can always add in other ingredients like black olives, basil, etc. I used the pepperoni I already had on hand, so I used about 5 per cup and made sure to overlap with the last one in the very middle.


After I baked the pepperonis by themselves at 400 for about 5 minutes, I did dab up some of the grease. I actually greased my cupcake pan beforehand but quickly realized that pepperoni does NOT need help in the grease department. Once they aren't floating in grease, I spooned on probably about 1 teaspoon of sauce per cup, and sprinkled on some cheese. This is where you would change things up and add your kid's favorites, since I was using what was already on hand...cheese was it!


Once your mini pizzas are topped, pop them back into the oven for 2-3 minutes, just until the cheese is nice and melty. Again, they'll be quite greasy, so once I took them out of the cups I let them sit on a paper towel to drain before putting into the fridge.


I sent 3 of these the next day for my son, and froze the other 3 for the following week. He approved and it put some excitement into his lunch time.


Mini Pepperoni Pizza Cups

From the Kitchen:
Cupcake pan
Pepperoni (the large sandwich pepperonis would work great for this too!)
Small jar of pizza sauce
Mozzarella cheese

Directions:
1. Preheat oven to 400
2. Place about 5 regular pepperonis around each cupcake cup
    If you're using the large ones, you will want to make 4 slits around the edges so they'll overlap and
    fit into the pan..don't cut all the way through!
3. Bake for 5 minutes
4. Use a paper towel to soak up some of the grease...they will be SUPER greasy!
5. Spoon about a teaspoon of pizza sauce into each pepperoni cup, top with cheese
6. Bake for about 3 minutes, just until cheese is melted
7. Remove from pan and let drain on paper towels
8. Serve right away, place into fridge for tomorrow, or freeze for next week!


March 11, 2019

Homemade Crispy Apple Chips


Looking for an easy to make healthy snack that the whole family can get on board with? Craving that crunch that only a chip can fix? Want a good snack for the trails? Well, have you tried apple chips?


We recently found out that my kids and husband really like apple chips, but we never buy them because they're either not to be found or they are priced too high for a bag of dried apples. My husband put me up to the challenge of making some myself, and that's exactly what I did!

I followed a "recipe", but the amount of time that was stated was NOT enough to give these apples a nice crisp so I thought I'd share what worked for us. By the time they were done in the oven, they were so sweet and had that crunch that could curb any potato chip craving! You can adjust the amount of apples used based on your needs, but for this recipe I used 4.
*4 is enough for a family of 4 to snack for 1-2 days, next time I'll buy a bag of apples and make more.

What you'll need:
Apples (I used Granny Smith and Fuji)
Spiralizer (or a knife and patience)
Parchment paper
Baking pan

I didn't peel our apples, but you definitely could, I didn't want the extra step so I washed them really well instead.

Preheat oven to 200°. The key to a nice crisp is low and slow, and you don't want to overcrowd the pan. Luckily we have double ovens and had plenty of room.

If you're using a spiralizer, cut the bottom of the apples off to make them flat...this makes it easier to place correctly making sure you are cutting off of the core.


Place onto spiralizer (I used my Kitchen Aid attachment) and let it do it's job. Once cut, use a knife to cut the spiralized apple into slices and make sure all the seeds are out. Evenly place onto parchment paper on baking pan.


At this point you can sprinkle them with any seasoning of your choice...cinnamon, sugar, etc., but I left mine plain.

Pop them into a preheated oven and leave them alone. The recipe I used had me flip them after 1.5 hours and cook for an additional hour, but they were still soft!

I suggest cooking them for 4 hours, then flip, and cook for an additional 5-6 hours. I know. A looooong time, but so worth it. Resist opening the oven until you see in the last couple hours that they're getting crisp. I cooked them on Saturday and once I had my oven turned off I let them sit in it over night, then turned it on again in the morning. (This was because I followed a recipe that didn't work.) You can easily see the apples changing with the oven light on, so track the progress that way.

I promise they will be so crispy and you'll please your whole family! We put them in snack baggies for the next day and they stayed nice and crunchy.


March 15, 2018

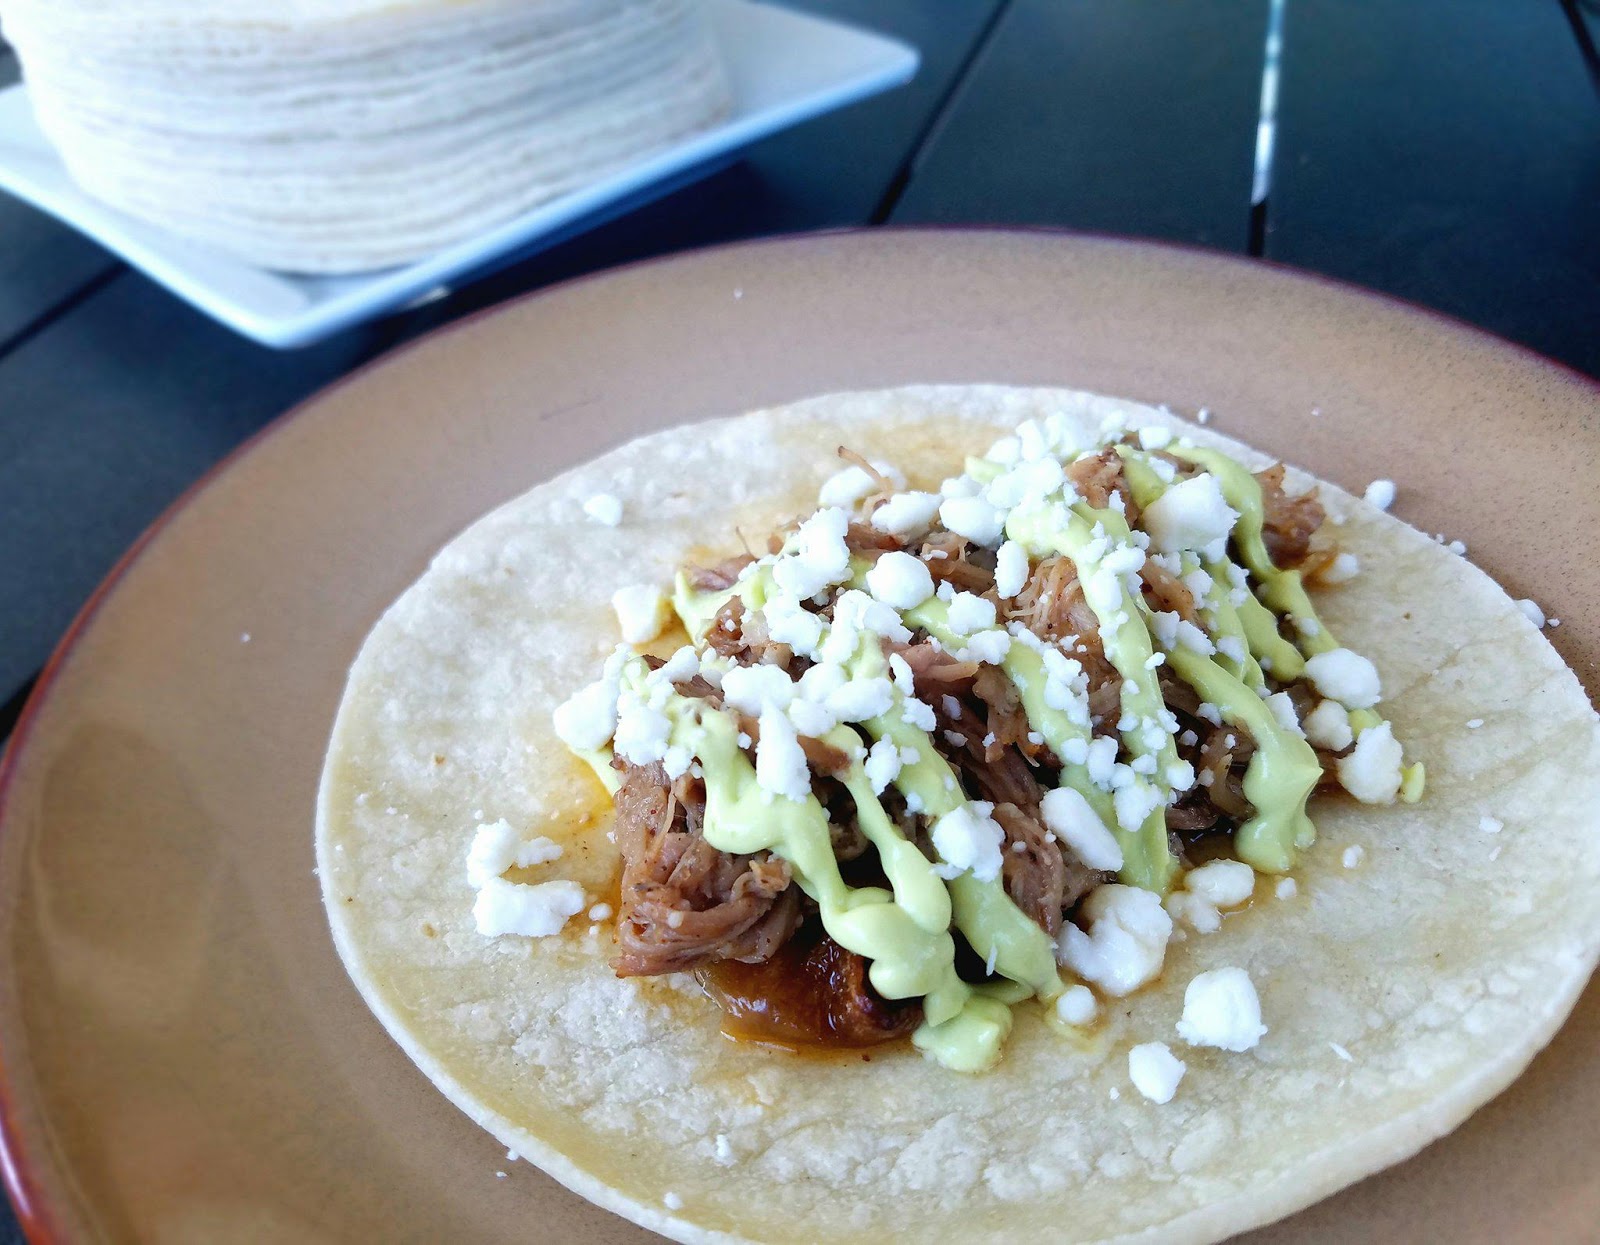
Slow Cooker Pork Tacos with Avocado Cream Sauce

Taco Tuesday! Is there any other Tuesday? I love tacos because they are simple to make, delicious, and you can switch up the ingredients to add a little more flavor to your week. We usually just stick with basic tacos using ground beef and taco seasoning, but my most recent trip to the Epcot Flower and Garden Festival had me CRAVING the most delicious pork tacos [side note: if you are local--gooo visit, and be sure to stop in Mexico for the pork carnitas, they are life changing and amazing], so I set out to find the perfect recipe to make at home. Hey, thanks again Pinterest! The recipe I found from Stuck On Sweet was easy enough to adapt to my family's likes and dislikes, and they were a big hit with everyone--including my semi picky husband.


Crock pot meals are a favorite around here, and I was pretty much drooling all day every time I would get a whiff of the pork slowly cooking. The 3 lb pork shoulder was rubbed with delicious spices which crisped perfectly on the edges. It always amazes me how much flavor can come out of the meat when you don't add any sauce to the slow cooker, a tablespoon or so was all that went into the pot before adding the seasoned meat. Although the original recipe didn't call for it, I added a sliced onion to the crock pot for a little boost of flavor, and I love cooked onions in my food!

After slow cooking for about 8 hours, I checked the tenderness and it was ready to shred. Using 2 forks, the pork shredded beautifully and I allowed it to sit and soak in the juices for about 20 more minutes before assembling our tacos and serving. Rather than doing this, you can take out the cooked pork before shredding if you want a less juicy taco. Again..so easy to adapt to your preferences.


All tacos need sauce, and I didn't change a thing about the sour cream avocado sauce in this recipe. It was just the right amount of tang to make this taco drool worthy. Now I am not a big avocado fan and neither is my husband, but it really didn't taste strongly of avocado and we both went back for seconds. And thirds. Possibly fourths. Who's judging? I also substituted the cojita cheese for goat cheese and my kids and I loved the flavor that it gave, my husband used regular cheddar cheese on his tacos.

Ingredients

Pork
  • 3-3.5 pound pork shoulder
  • 2.5 teaspoons salt
  • 3/4 teaspoon black pepper
  • 3/4 teaspoon onion power
  • 3/4 teaspoon garlic powder
  • 1 teaspoon dried oregano
  • 1.5 teaspoons chili powder
  • 1/4 teaspoon cumin
  • 1/4 teaspoon paprika
  • dash of cayenne pepper (original recipe 1/8 tsp)
Sour Cream Avocado Sauce
  • 1/4 cup sour cream
  • 1/2 an avocado
  • juice from half a lime (I used lime juice I had on hand)
  • pinch of salt
Other Ingredients
  • Corn tortillas
  • Goat cheese (or cheese of choice, original recipe Cojita cheese)
  • 1 tablespoon olive oil
  • Fresh Cilantro
  • Salsa

Instructions

  1. Mix together all of the pork seasoning in a bowl and rub onto all sides of pork. Place a tablespoon of olive oil into bottom of crock pot, and place the pork on top. If using onions, cut them as you desire and place them around all sides on the pork. Turn crock pot to low and slow cook for 8 hours. You will know it is done when the pork is easily shredded and falling apart.
  2. To make the Sour Cream Avocado sauce, place all ingredients into a food processor and blend until smooth.
  3. Assemble tacos and drizzle sour cream avocado sauce on top, then add cheese.
*Recipe adapted from Stuck On Sweet's recipe for Slow Cooker Pork Tacos.


And if you're interested, the next day we used the pork leftovers to make a taco salad. You could add anything you wanted, but we used lettuce, shredded pork, goat cheese, corn, and a bit of sour cream. BIG hit with the kids! Oh and my husband was actually asking for more of the sour cream avocado sauce, which is pretty unheard of...ha!


July 3, 2017

Delicious Pancake Muffins

Breakfast...I seriously LOVE breakfast and so do my kids. I try to make sure they get a variety of foods during the week and these pancake muffins are a pretty big hit around here. They are quick, simple, and you have the freedom to mix in anything you choose.

Step 1 - Prepare Muffin Cups
We have silicone muffin cups that I use, but I sometimes use the muffin pan by itself. If you do this, just be sure to spray them with cooking oil so the muffins don't stick. Paper cups work as well. This recipe will make about 12 muffins.

Step 2 - Mix the batter
Use whatever pancake mix you usually use, whether it be homemade with flour, or a store bought brand, and mix it as if you are going to make regular pancakes. I used Bisquick and I like to add in a little vanilla, lemon juice, and sugar to give it a mouth watering kick.


Step 3 - Pour and Mix-Ins
Pour about 2/3 cups into each muffin cup. This is when we add different mix-ins individually to each muffin cup. We use chocolate chips, cut up banana, blueberries, and sprinkles. You could even add in cooked sausage.


Step 4 - Bake
Bake in preheated (375) oven for 18-25 minutes, or until a toothpick comes out clean.


Step 5 - ENJOY!!
Eat plain, spread some butter, or dip in syrup...whatever you choose, you won't be disappointed.


These muffins are great opportunity for the littles to help out, my 3 year old loves stirring the batter and dropping in the mix-ins. They are delicious served hot, but my kids will also eat them the next day right out the fridge. A definite easy and must try pancake recipe!

March 31, 2017

Quick & Delicious Homemade Pizza

It's no lie that pizza is one of my toddler's favorite foods. In the past, we have made individual pizzas using tortillas, but tonight when the pizza request was made we didn't have any! To avoid an epic melt down, I thought it would be fun to MAKE some pizza dough and go from there. Brilliant! I was excited, the kid was excited...and then I realized that we don't ever have yeast on hand. Does anyone?

Thank goodness for the internet because I found this quick recipe from Recipes.com that uses 5 simple ingredients, none of which are yeast. Pizza date back on!

After reluctantly helping me to mix all of the ingredients, his enthusiasm picked up when I told him he got to knead the dough. He may have heard that we were going to EAT the dough, which could be the reason why he came running back into the kitchen so fast. This step was perfect for even the littlest of hands, and Cade totally thought it was the coolest thing ever.


I also caught him eating the sauce off of the spatula, and spilling it on the counter, and dropping it on the floor. No clothes were harmed in the making of this pizza.

Sauce on, cheese on, time to bake!


I was pleasantly surprised with how well this pizza turned out, and it tasted pretty yummy! Baby and toddler approved--that's the biggest thing right? Not only was the taste on point, but it was ready to eat in under 45 minutes.


Ingredients and Directions:

Ingredients for dough:
1 1/3 cups flour
1 tsp baking powder
1/2 tsp salt
1/2 cup milk
2 tbsp olive oil


Mix together the dry ingredients.

Add in milk and olive oil.

Mix thoroughly to create dough..IT WILL BE STICKY!

Lightly flour a hard surface and your fingers---knead the dough 10 times.

Roll dough into a ball and let rest under a bowl for 10 minutes.

Bake at 400 degrees for 6-8 minutes.


Ingredients for sauce:
2/3 cups tomato sauce
Italian seasoning to taste (we used garlic power, basil, and oregano)


After dough bakes for 6-8 minutes, spread on sauce and top with cheese--add other toppings at this point.

Bake for another 10-20 minutes, or until pizza is golden brown

Cut and serve! Delicious!